
Manuals and Useful Info
Aerial Rig set up manual
Setting up and breaking down an aerial rig can be done relatively quickly and safely if you follow this manual and are cautious.
Setting up or taking down an aerial rig in rush and not following proper procedure or using PPE can easily result in injury.
-We always recommend having a person in charge who is familiar with setting up an aerial rig and has done this before.
-Do not set up an aerial rig if you do not know how and do not fully understand this manual.
-Always inspect the rig for proper assembly at each height as you erect the rig.
-Make sure set screws are tight and that snap buttons are engaged before you set up to the next height.
-All set screws at every joint and level need to be properly tight.
-About fully wrist tight is good. You want the set screw to be tight enough that there is no play and that they won’t wiggle loose. Do not tighten them so hard that it damages the screw or the metal of the rig itself.
-The screws that hold the leg sections are in place to make the rig more stable by removing any play at the joints.
-Always keep the area clear of any persons not involved in the set up or break down of the rig.
Wear gloves and protective shoes. Watch your hands and feet for pinch points. Keep good and clear communication with others involved in setting up or taking down this rig so that you do not drop pieces on one another.
Pinch points are between each leg. Pay close attention to your hands and tell the people you are working with to do the same, or you may end up easily pinching a hand or finger.
Steel doesn’t play around! Watch your fingers and toes please!
Always lift up two legs at a time, do not lift one leg at a time leaving one leg dangling in the air where it can fall out and hurt someone.
Again, after assembling each level of height, inspect the assembly of each leg.
Make sure that the set screws are tight and snap buttons are properly engaged.
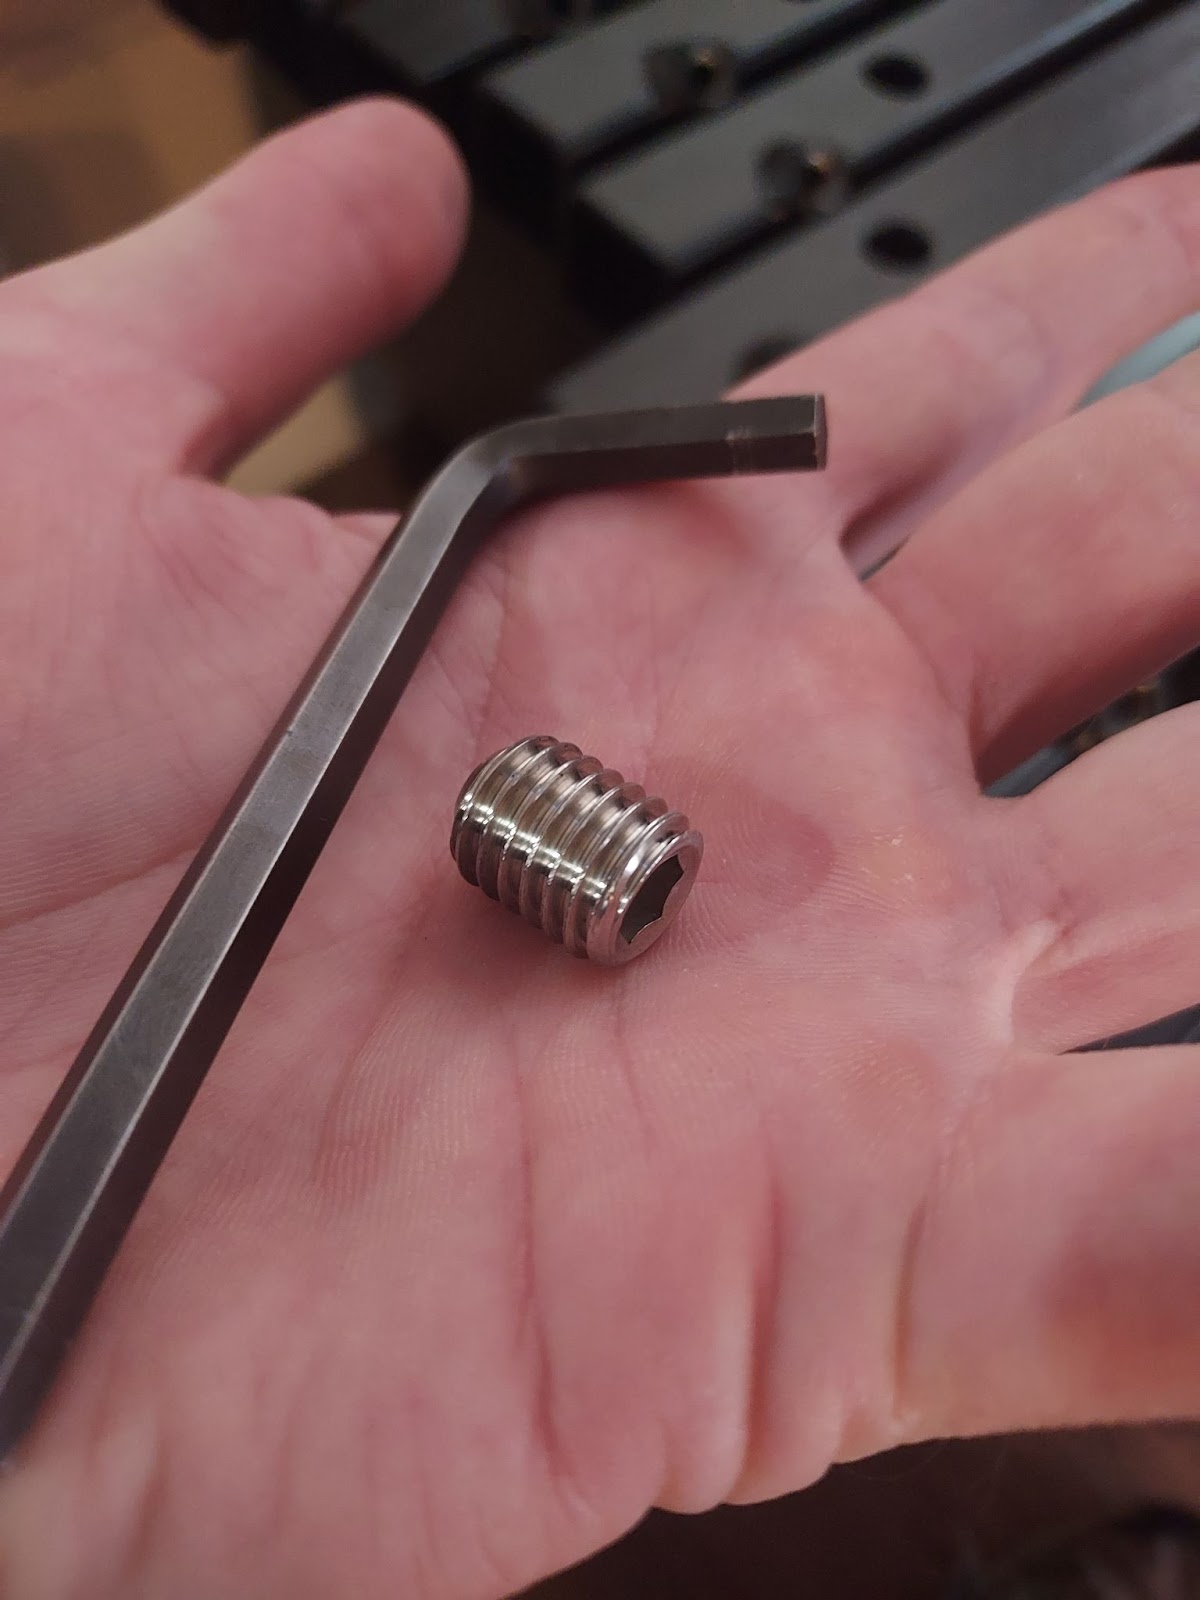
The screws are 1/2-13 x 5/8″ Stainless Steel set screws,
Attention, If all set screws are not tight and snap buttons are not engaged, then a leg section can and will slide off and fall when you pick the rig up to add or remove leg sections.
Always be aware of this possibility when erecting or breaking down an aerial rig.
Never have people standing around in the area during erecting and take-down that are not involved in the process. Clear the area of uninvolved and unaware people.
Snap buttons, prevent a leg from slipping out when not intended, for example taking up and down the rig.
These snap buttons are NOT for securing the legs together, that is the primary job of the set screws. The snap buttons are a safety back-up to keep the rig in place and help avoid incidents.
Set screws are what hold the legs together, you do not need a pin that goes through both legs. Our design utilizes a set screw to hold the legs tightly in place. This removes the play between the two pieces of tubing and keeps the legs TIGHTLY in place. Many other rigs do not do this.
Erecting the rig:
The process of assembling a Quad rig or a Tripod rig is very similar.
Tripods are a bit easier to set up because they are lighter and because you only lift 1 leg at a time to set up, vs. 2 legs at a time for a Quad.
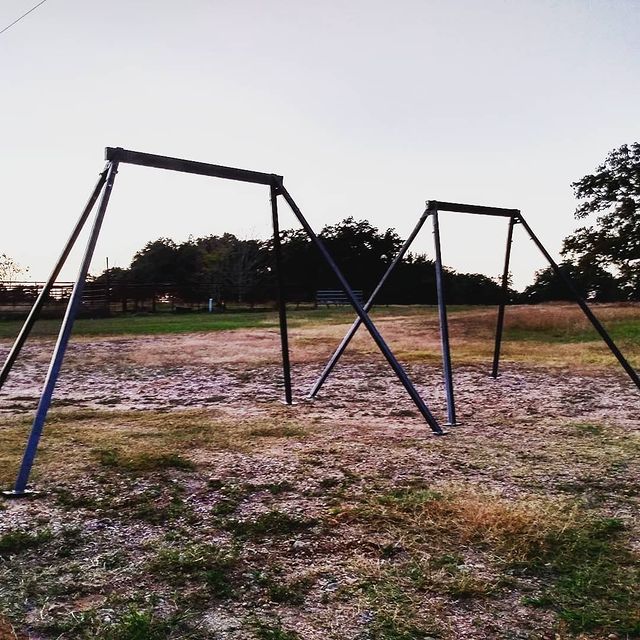
Quad header: Tripod header:
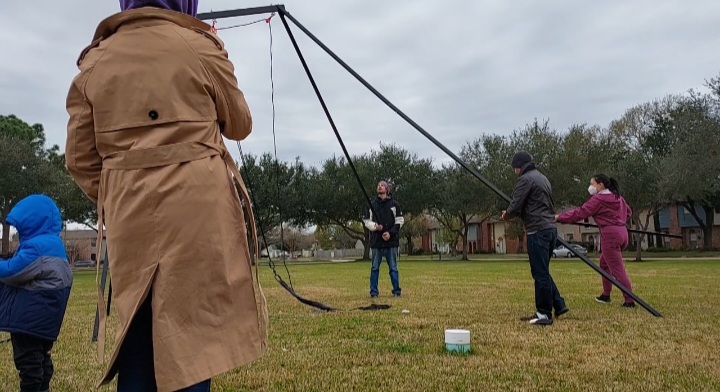
There is more than one way to set up this aerial rig. Some people like to lay the header upside down and set their rig up perpendicular to the header axis. I prefer to set up my aerial rigs running parallel to the header axis as the rig is erected. See pictures below:
Insert the first 2 leg portions into the header of the aerial rig, lining up the snap buttons with the according holes.
Now, carefully lift up the side of the rig with no leg sections in, hold it up and have an assistant insert the other 2 leg sections. For a tripod rig, put the header on its side on ground and insert the 3 leg sections. Make sure the snap buttons engage. Tighten set screws and flip right side up. Continue to follow the same directions as the quad rig, only you will have 3 sides versus 4. The process is identical.

Tighten set screws as described above, fully wrist tight so that there is no play left between the tubing, but do not overtighten, it will damage the base metal and the nuts and/or set screws.
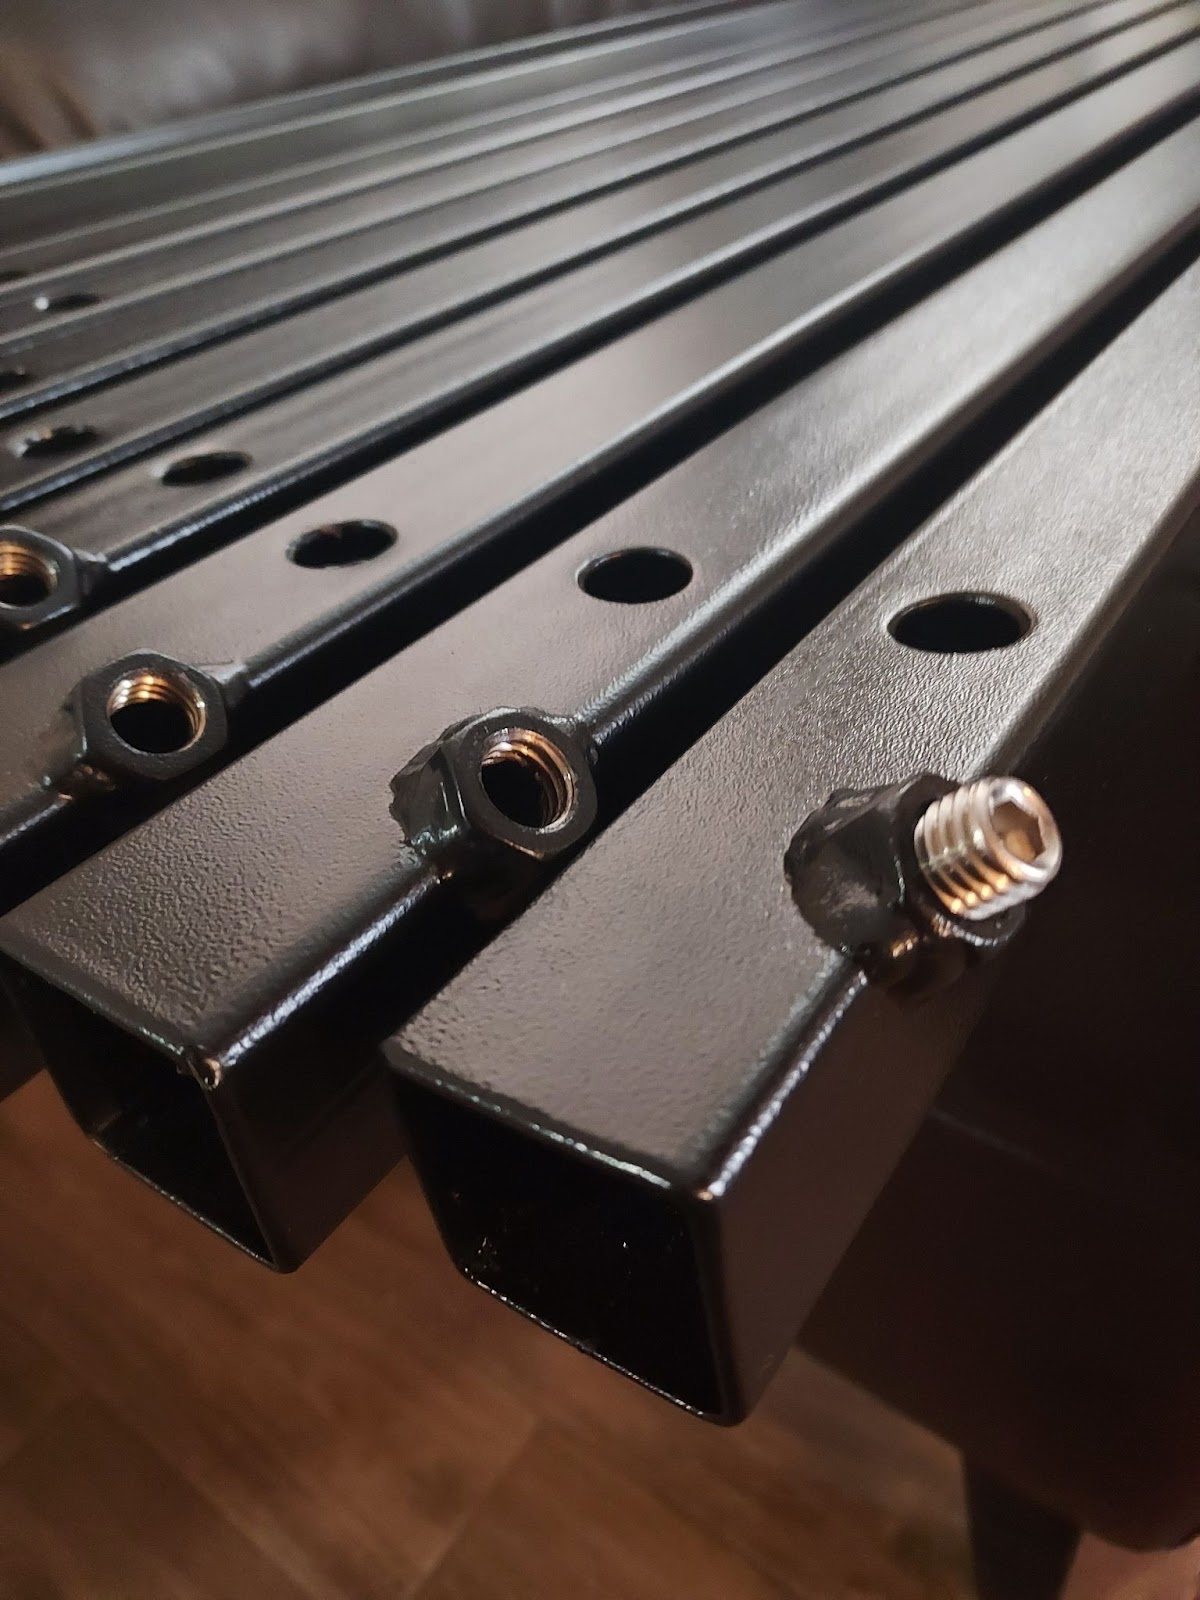
SET SCREWS AND LOCATION
The following images show the set screws and their locations. There are 4 locations on the quad header to place set screws, and 3 for the tripod header.
All leg portions have one set screw location as well. The set screws go in all of the nuts after you insert the legs together. They are there solely to remove any play at the joints between the leg pieces. The snap buttons are what keep the legs from falling out. Be sure both are engaged.
If a set screw ever gets stuck in the nut welded to your aerial rig, which happens rarely, but if it does, you can fix it! Use a long breaker bar with a ¼” allen wrench attachment to break loose the set screw and re-tap the nut with a ½” x 13 tap. These are available online and at most hardware stores.

You should now have the 1st level of legs in place.
Now is the best time to hang your aerial equipment or pulley system, as seen in the picture above. You will not want to try to attach a silk or other apparatus when you are 20ft high. There are several ways to rig and set up a pulley system, depending on personal preference and use case. We have attached a few options in the pictures below as well as diagrams at the bottom of the manual for your reference:


When using a pulley system, again, there are multiple ways to hang or rig it. You can run the pulleys to just ONE leg and ONE cleat for simple, soft aerial training like ambient flow acts, sling or hammock, lyra, aerial yoga, static trapeze and more. Anything that does not generate a large shock load from drops.
Improper rigging or improper setup of aerial rig such as rigging to only one cleat, not tightening footprint and performing heavy drops or rolls, can cause legs to bow or bend over time. It is important to always follow the recommendations in this manual.
You may also rig to TWO cleat points, which distributes the weight to TWO of the rig legs rather than one, and allows more support for light rolls and drops. This option is good for handling light rolls, drops and shock loads on aerial silks or rope.
When using either the Acrofab Tripod or Acrofab Quad Rig, the best way to distribute the weight to ALL of the rig legs, despite which rig model you use, is to rig directly to the eyebolt itself and not use a pulley system. However, this will result in needing to use a ladder or to lower the aerial rig down to change apparatuses.
Remember, these aerial rigs are designed as portable aerial rigs. Able to fit in most mid sized vehicles, able to be transported to gigs, and taken up or down in a matter of minutes.
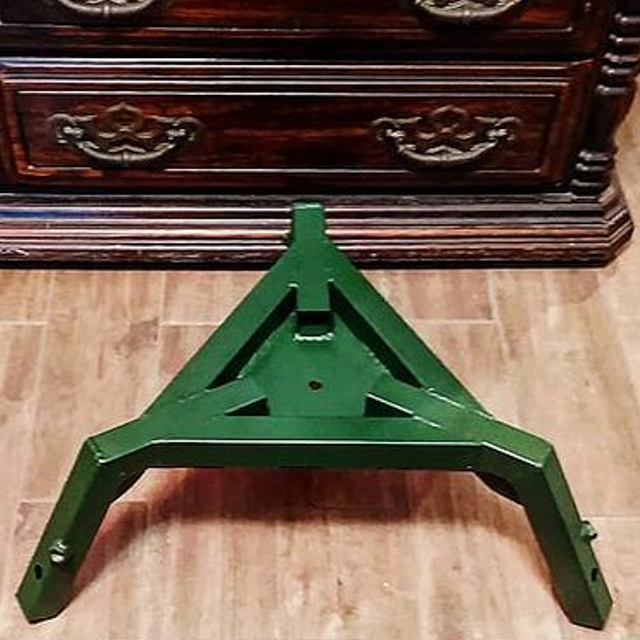
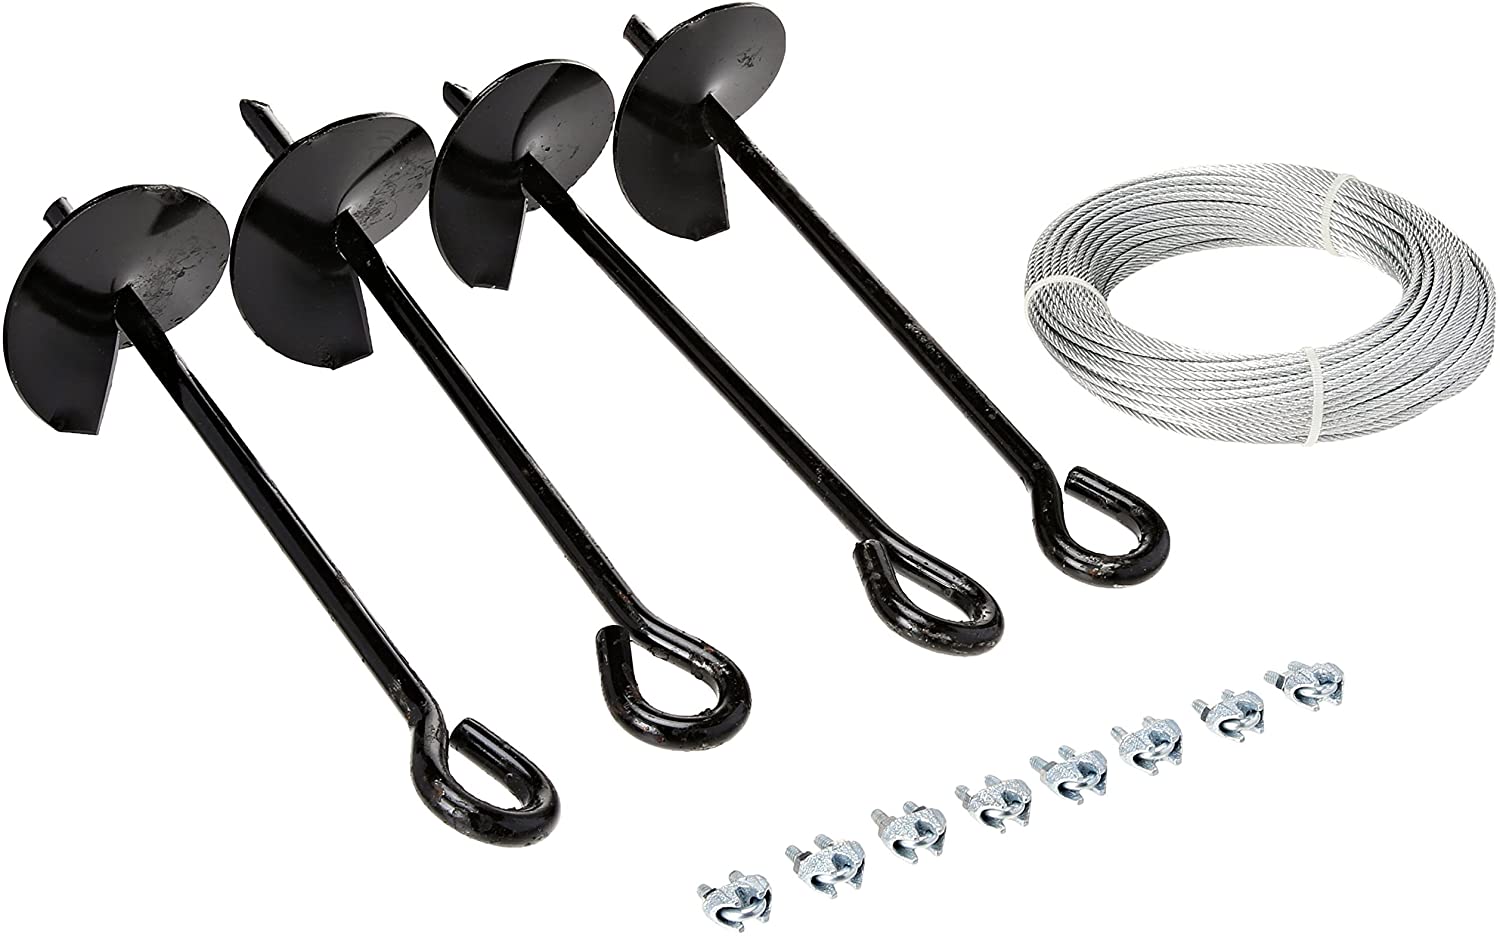
If you will be using a guy wire system , now is a good time to attach the guy wires to the holes on each end of the quad header. Do not forget if you are using guy wires you will need anchors that go into the ground. These guy wire systems and anchors can be found at hardware stores such as home depot, etc.
Most people do not use the guy wire system option unless they are leaving their rig up permanently or for a long amount of time and are doing a large amount of swinging on the rig and dealing with very windy conditions.
This is an example of a guy wire anchor system, approximately 18-24 inches long works well:
Always, before proceeding to the next set of legs that will bring you to the next height level, INSPECT the rig to be sure that all snap buttons are engaged and all set screws are properly tight.
Failure to do this could cause a leg to fall out as you lift and result in injury.
2nd level of legs:
Before lifting one side of the rig up as shown in the picture below, it is helpful to have the legs that you are about to insert into the rig close by. This way the person holding up the rig is not holding it up for very long and the legs go in quick and easy.
Never leave a rig with only 3 leg sides in, where you have one leg dangling in the air. It can fall out, the rig tip over or injure someone.


We always recommend using 2 strong people to lift the rig and one person to insert the leg pieces.
Again, once you have the legs in, tighten the set screws as described above.
Be careful! When lifting one side high enough to insert the next leg section you are
close to the rig’s tipping point. The rig could be dropped and fall on someone if you are not careful!
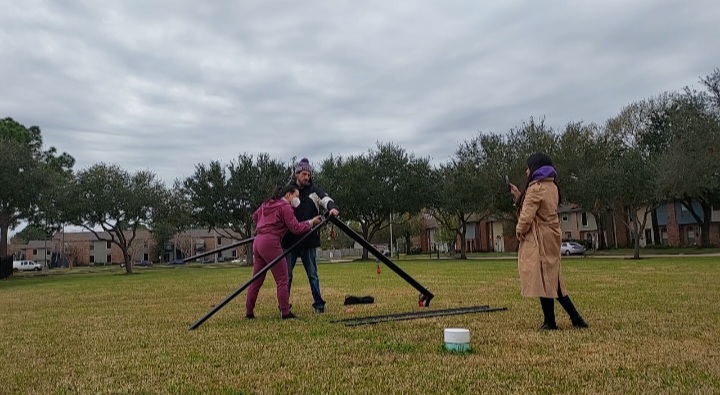
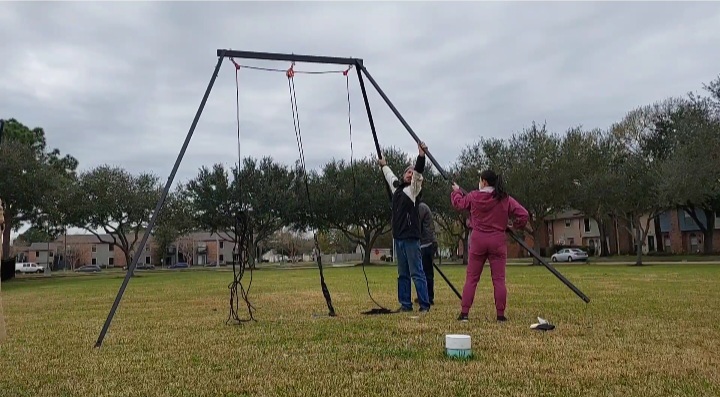
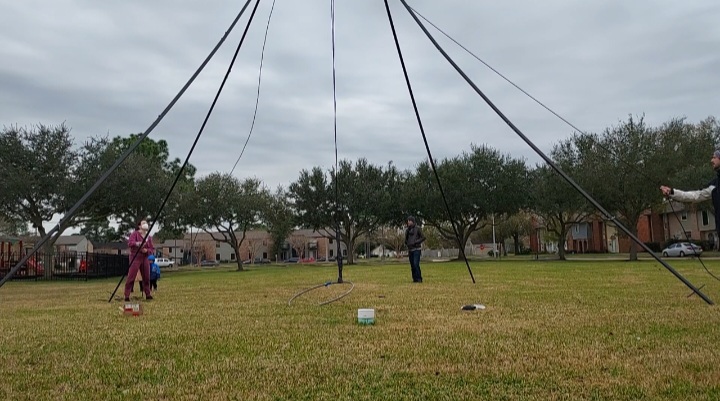
Now, lift the other side and insert the 2nd two legs:
This picture shows me lifting up one side of the rig on my own, I highly recommend using three people for this stage if you have them. Two people, each hold up a leg section and one person to insert the leg pieces. It is always best to set up a quad rig with 3 people if you have them. The quad rig can be set up with 2 people like this if that’s all you have, given those two people are very familiar with the process, are both strong and have set up the rig many times before.
Once again, tighten the set screws as described above.
WARNING, DO NOT lift the rig so high one one side that it topples over.
This is especially important on TRIPOD rigs.
You should now have two leg segments installed in each corner of the aerial rig.
You now have the 2nd level of legs in place.
Remember: Before moving to the 3rd set of leg sections you must check all the set screws and make sure they are tight.
3rd level of legs:
Time to go up another level to the 3rd level set of legs.
-This will be a little more difficult because the rig weighs more now. You will be lifting more weight!
–Lay the next set of legs close to the rig where you can insert them easily and quickly. The rig is heavier now and the people lifting the rig will not want to hold the rig up as long.
-Lift one side of the rig, insert the 1st set of two legs on the 3rd level. Then tighten the set screws as described above.
-Now, lift the other side of the rig and insert the 2nd set of two legs on the 3rd level and tighten the set screws.
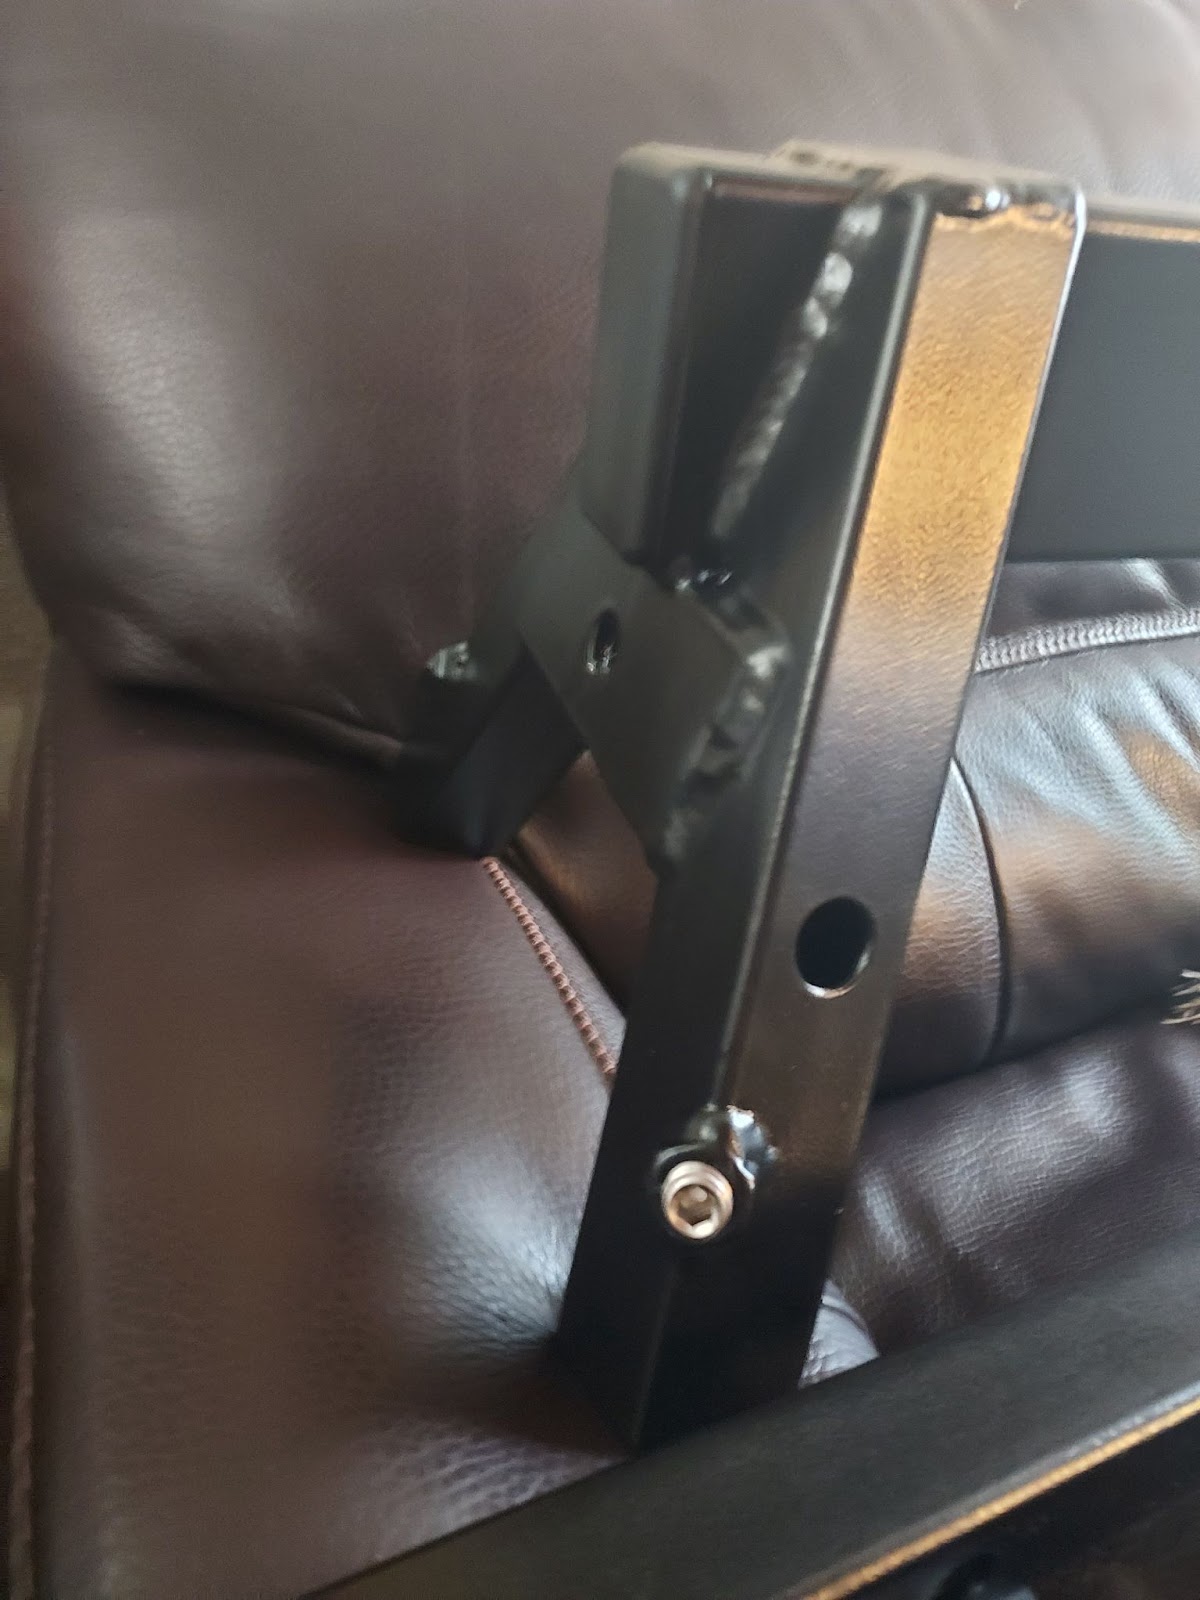
Now, to reach the rig’s maximum height, you add the 4 extension feet and set the pins.
-Again, before adding the extension feet go around the aerial rig and be sure that all of your set screws are tight and snap buttons are engaged.
-Now, lift one side of the rig, insert the 1st two extension feet on one side of the aerial rig, place wire lock pins in the according holes at desired height. Allow the 3rd level of leg portions to sit on top of the wire lock pins that go in the adjustable feet.Tighten set screws. There is no snap button at this location. A properly tightened set screw and gravity are more than enough to secure the rig in place. If the feet or a leg section slide around, the set screw is not tight enough.
-Now, lift the other side of the rig and insert the 2nd set of two extension feet, insert the wire lock pins and tighten the set screws.
-Make sure you put all 4 pins in the same location on the extension feet. If you are on uneven ground or a surface with a slope you can utilize the extension feet to level out the rig.
-Always set up your aerial rig as level as possible.
You are now at about 21 feet high. Your rig is now at its final height. Time to attach the chains or straps. (See pictures below)
The chains or straps prevent the legs from spreading as it is loaded up and being performed on.

The chain should be one long length of chain, not individual chain lengths. The straps are 4 individual straps with adjustment buckles.
You should use the chain or straps no matter what height option you choose to set up your rig to! Always use chains and/or straps.
Reminder, the wire lock pins are put into the adjustable feet and the legs rest on top of the pins. Wire lock pins should run perpendicular to the axis of the header for quad rigs. Make sure to put your quad feet so that the direction of the wire lock pins is not running in the same direction as the header is. The direction of the wire lock pins should not run paralell with the direction the header is running.
The set screws on the legs can then be easily tightened to hold the adjustable feet firmly in place.
Never use the rig on a surface that has too much slope that you cant level out the rig.
Adding chain or straps:
-Used to stabilize legs so that they do not slide outwards as rig is being used.
-This chain also is used to adjust the location of the feet so that legs are nice and straight, not bowed.
-Look at each leg and check that it is close to straight, not bowed. Make adjustments as needed.
-Final adjustments to get the rig legs straight as possible is done as the chain or strap is added and tightened.
-Remove any bow out of the legs by pushing the legs one by one towards the center of the rig to have each corner of the rig form as straight of a line as possible as you tighten the chain or straps.
Add chain or straps:


NOTE: All of our rigs come with a hole drilled in the feet. This hole is used as an option to place stakes into the ground instead of using the straps or chain. Using both chains/straps and stakes is even better but not always necessary.
-Use your best judgment for how to set up your rig based on what you are using the rig for.
-Example: Lots of swinging and lots of wind: Guy wires, stakes and chain is advised.
-NEVER swing beyond the legs of the rig. This is not a swing set.
You MUST either use chains/straps or stake feet into the ground. This creates a “footprint” around the rig.
This footprint prevents the legs from spreading out as the rig is in use and moving around. The legs spreading out will cause the legs to no longer be straight and reduce the strength of the rig. It also puts extreme pressure on the header.
If using straps, make sure to feed the strap through the buckle in the proper direction. If you do
not, the straps will not hold weight and will not stay in place. See picture below.

IF USING A PULLEY SYSTEM
Tie off rope for pulley system to cleats:
-Follow the pulley diagram attached below or use the prior pictures provided to choose your preferred pulley rigging layout.
Tie off the ropes to the cleats to secure your pulley system. The tie off cleats and pulley system are sold separately. You will also need to have additional eye bolts installed on the header of your rig if you would like to hang multiple apparatuses, or to use a pulley system. I sell the tie off cleats, extra eye bolts, pulley systems, rope and other accessories for this rig separately.
ATTENTION:
It is the owner/user of the aerial rigs’ full responsibility to ensure proper transport, maintenance and storage of the equipment over time. Since the manufacturer will not be present during the time of use or to make sure the rig is properly maintained, stored, or how it will be used, it is the responsibility of the owner to take care of their rig.
The rig should be fully and completely inspected before every use to ensure that all rigging points are tight, nuts and bolts are tight, and the overall integrity of the rig is in good condition. Never use a damaged or degraded aerial rig.
It is advised to store the aerial rig in a dry and cool place when not in use, such as a covered garage or storage space. If the aerial rig is exposed to the elements, the rig should be properly cleaned, dried and drained after each use or the aerial rig can degrade quickly and become unsafe for use! Aerial rigs may need to have paint touched up or re done in some cases, depending on how you take care of, store and transport your rig.
Remember, these aerial rigs are designed as portable aerial rigs, allowing them to be and intended to be taken up and down easily, in different locations, venues etc in just a matter of 20-30 minutes.
The exterior of your aerial rig is powder-coated to add resistance, not weatherproofing, to the elements, which is much stronger than traditional paint. However, the inside of the rig is still bare and you do not want standing water inside of the rig. It is extremely important to drain all water and make sure your rig is properly dried, each time if you expose it to rain or other elements. There are holes drilled at the bottom of each rig foot. These can help you to tilt and drain water from your rig, However you may want to take down your rig to be sure there is no water accumulated in the header (top piece).
If you are leaving the rig up for a long time and exposing it to water, you can add 9/16” hole plugs to prevent water from accumulating in the header piece where the other eye bolt rigging points are not installed if you are not using all of the points. If not, make sure to take down the rig regularly, dry and drain.
These can be found on amazon. They are called 9/16” hole plugs.

Minor scratching and scuffing of paint is advised to be DIY touched up, using either a close color of acrylic nail polish, or a clear coat spray paint enamel.
Be smart, be safe. It is your life and health that are hanging on an aerial rig. It is up to you to take care of yourself and properly maintain and store the aerial rig.


